Why treat seed with nutrition?
The first two to three weeks after sowing decide how many plants you get per acre and how evenly they grow. A seed that germinates late or weak rarely catches up. Nutritional seed treatment puts nutrients and biostimulants directly on the seed, right where the young root and shoot first need them.
This is different from fungicide or insecticide seed treatment, which protects the seed from soil-borne pests and diseases. Nutritional treatment supports germination, emergence and early root growth. The two work side by side, and most good seed programmes use both.
This guide walks you through on-farm nutritional seed treatment using three Verdesian products:
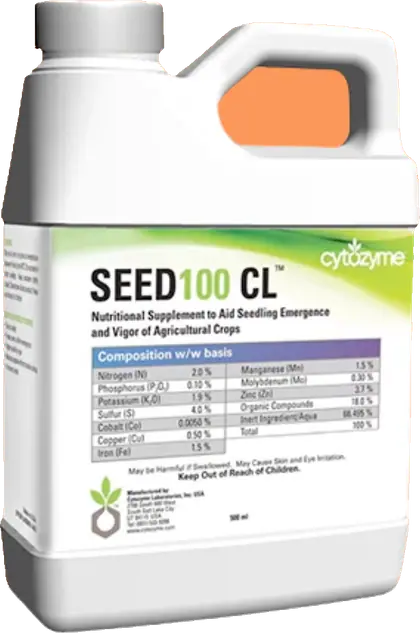
- Seed 100 CL™ – a nutritional supplement to aid seedling emergence and vigour, applied dry.
- SDM® – a dry-powder nutritional supplement for seed treatment, used on crops such as corn, groundnut, cumin, mustard and cereals.
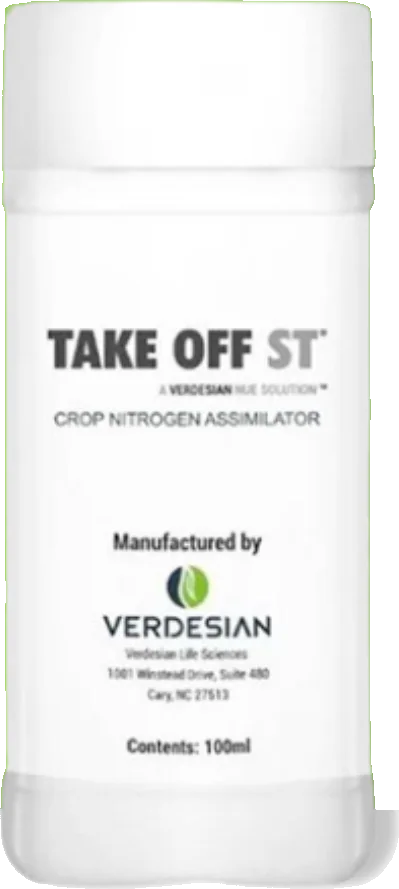
- Take Off ST® – a crop nitrogen assimilator for seed treatment, used at 1 ml per packet of seed.
What you need before you start
Get everything ready before you open the seed bags. Treatment should be done in one go, without stopping halfway.
| Item | Purpose |
|---|---|
| Seed (counted by packet or weighed) | To calculate the correct product quantity |
| Seed treatment products and their labels/handbills | Dose and method for each product |
| Clean plastic sheet, tarpaulin or seed-treating drum | Even mixing without losses |
| Nitrile or rubber gloves, mask, full sleeves | Personal safety |
| Measuring cylinder or syringe (for liquids) | Accurate dosing of Take Off ST and any liquid pesticides |
| Clean, labelled bags | Storing and carrying treated seed |
| Shade area | Drying treated seed away from direct sun |
Step-by-step: on-farm nutritional seed treatment
Step 1: Check the seed
- Use good-quality seed with known germination. Treatment helps a good seed perform better; it cannot fix poor or damaged seed.
- Remove broken seed, stones, weed seeds and chaff.
- Count the packets or weigh the seed so you can calculate exact product quantities.
Step 2: Read every label
- Read the label or handbill of each product you plan to use – nutritional and protective.
- Note the dose, whether the product is applied dry or as a liquid, and any instructions on order of application.
- If two labels give conflicting instructions, check with your dealer or a Verdesian agronomist before mixing.
Step 3: Plan the sequence
When you use a fungicide or insecticide seed treatment as well as a nutritional treatment, decide the order before you start. Seed 100 CL and SDM can be used alongside all types of pesticides and fungicides. A simple, practical sequence that many farmers follow is:
- Protective treatment first – apply the fungicide and/or insecticide as per its label, and mix until every seed is evenly coated.
- Liquid nutritional treatment – apply Take Off ST at 1 ml per packet of seed, spreading it evenly over the seed lot and mixing well.
- Dry nutritional treatment – apply Seed 100 CL or SDM dry, as per the label, and mix thoroughly.
Always follow the order given on the product labels where one is specified.
Step 4: Apply the dry products correctly
Seed 100 CL and SDM are applied dry. Both product pages are clear on this: do not use water.
- Spread the seed on a clean sheet or put it into a seed-treating drum.
- Sprinkle the measured quantity of Seed 100 CL or SDM evenly over the seed.
- Mix gently but thoroughly – roll the drum or lift the corners of the sheet – until the coating looks uniform.
- Handle the seed gently to avoid cracking the seed coat, especially in groundnut and other bold-seeded crops.
Use Seed 100 CL and SDM only for seed treatment – not as a soil or foliar application.
Step 5: Apply Take Off ST at the right dose
Take Off ST is used at 1 ml per packet of seed. It comes in 10 ml, 25 ml, 100 ml and 1 L packs, so pick the pack size that matches the amount of seed you are treating.
- Measure the exact quantity with a syringe or measuring cylinder – do not guess by pouring from the bottle.
- Distribute it evenly over the seed and mix until all seeds are covered.
- Refer to the Take Off ST handbill for any further mixing instructions.
Step 6: Dry in shade
- If any liquid treatment has been applied, spread the seed in a thin layer in shade until the surface is dry.
- Avoid drying treated seed in direct, hot sun.
- Do not bag wet seed – it can stick together and sow unevenly.
Step 7: Bag, label and sow
- Fill treated seed into clean bags.
- Label each bag clearly: "Treated seed – not for food or feed", with the crop, date and products used.
- For Seed 100 CL and SDM, planting can be done any time after treatment. Plan your treatment close to sowing anyway, so the protective treatment is fresh and seed is stored for as short a time as possible.
- Check and calibrate your seed drill or planter, as treated seed can flow slightly differently from untreated seed.
Safety checklist
Treated seed carries chemicals, especially when fungicides or insecticides are part of the treatment. Treat it with care.
- Wear gloves, a mask and full sleeves while treating and handling seed.
- Do not eat, drink or smoke while treating seed.
- Keep children and animals away from the treatment area.
- Never use treated seed for food, feed or oil extraction.
- Store treated seed in labelled bags, away from food grain and fodder.
- Wash hands, face and equipment after treatment. Do not wash equipment in ponds or canals.
- Dispose of empty containers safely, as per label instructions.
Common mistakes to avoid
- Adding water to Seed 100 CL or SDM. Both are applied dry. Adding water goes against the product instructions.
- Guessing the dose. Take Off ST is 1 ml per packet of seed. Measure it every time.
- Uneven mixing. Seeds that miss the coating miss the benefit. Mix until the coating looks uniform across the lot.
- Skipping the label. Every product, including your fungicide and insecticide, has its own instructions. Read them before you start.
- Drying in hot sun. This can stress the seed. Dry in shade.
- Unlabelled bags. Treated seed must always be identifiable so it is never used as food or feed.
- Treating poor seed. Nutritional treatment supports good seed; it does not make up for low germination or damaged seed.
What results to look for
After sowing, walk the field during emergence. Good nutritional seed treatment supports earlier and more uniform emergence, better root development and healthier seedlings. Compare a treated strip with an untreated strip on your own farm – look at how evenly plants come up, the plant stand per row and root growth when you gently pull a few seedlings.
Talk to a Verdesian agronomist
The right combination and sequence of seed treatments depends on your crop, seed and the protective products you use. Contact a Verdesian agronomist to plan your seed treatment programme, or request trial reports for your crop.
Frequently asked questions
Should I add water when applying Seed 100 CL or SDM?
No. Both Seed 100 CL and SDM are applied dry. Do not use water with either product.
What is the dose of Take Off ST?
Take Off ST is used at 1 ml per packet of seed, as a seed treatment. It is available in 10 ml, 25 ml, 100 ml and 1 L packs.
Can nutritional seed treatment be done along with fungicide or insecticide seed treatment?
Yes. Seed 100 CL and SDM can be used alongside all types of pesticides and fungicides. Follow each product's label for the order and method of application.
How soon after treatment can I sow the seed?
For Seed 100 CL and SDM, planting can be done any time after treatment. Make sure any liquid treatments applied in the same batch have dried before bagging or sowing.